A renovation is the one moment when opening walls is normal, trades are already on site, and infrastructure decisions are still cheap to get right. That is exactly why the best wifi setup for renovations starts long before anyone picks a router. If you wait until paint is dry and joinery is installed, your options shrink fast and your network usually ends up working around the building instead of being designed for it.
For most homes and many commercial fit-outs, WiFi performance problems are not really WiFi problems. They are planning problems. Dense materials, poor cable routes, badly placed equipment, and an overreliance on wireless mesh all show up later as dropped calls, buffering TVs, offline cameras, and smart home devices that behave unpredictably. During a renovation, you have the rare chance to solve those issues properly.
What the best wifi setup for renovations actually looks like
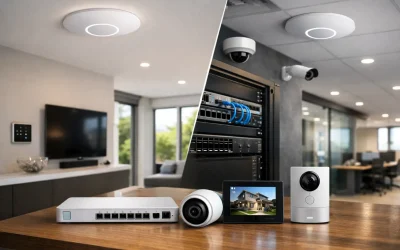
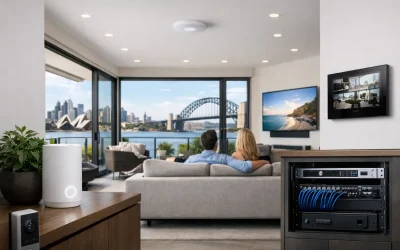
The right setup is usually not a single powerful router in a cupboard. It is a structured network with hardwired wireless access points placed where coverage is needed, supported by proper cabling, switching, power, and equipment location. In a larger home, that may mean a UniFi gateway, PoE switch, patch panel, and multiple ceiling-mounted access points. In a commercial tenancy, it may also include VLANs, guest networks, CCTV traffic separation, and integrated access control.
The reason professionals design it this way is simple. Wired backhaul is more stable than wireless backhaul. Access points perform better when they are positioned for the space rather than forced into whatever corner has an internet handoff. And networks last longer when they are built as infrastructure, not as a stack of retail boxes added over time.
That does not mean every property needs the same level of complexity. A two-bedroom apartment renovation has different needs than a three-level concrete home or a warehouse office fit-out. But the principle stays the same: plan the network as part of the renovation scope, not as an afterthought.
Start with the floor plan, not the hardware
A good design begins with how the building will be used. Where will people work, stream, make video calls, use tablets, or rely on wireless control? Where will you have smart TVs, Sonos or other multiroom audio, Apple Home, Home Assistant, CCTV recorders, intercoms, alarm panels, or access points for outdoor areas? Those answers matter more than the marketing claims on any box.
Materials matter too. Renovations often introduce things that weaken wireless performance: stone feature walls, large mirrors, metal-framed cabinetry, underfloor heating systems, tiled bathrooms, and insulated foil-backed plasterboard. Open-plan layouts can help coverage, but they can also create odd dead zones if the access point placement is based only on visual symmetry instead of RF behavior.
That is why the best wifi setup for renovations usually includes a predictive design approach. You map likely client devices, note high-density areas, consider wall composition, and place access points based on coverage and capacity, not guesswork. In premium homes, even lighting design and joinery details can affect placement. A beautifully finished ceiling is not the place to discover there was never a practical route for data and power.
Cabling is the part you cannot fake later
If there is one decision that separates a professional renovation network from a patched-together one, it is structured cabling. Run Cat6 or better to each wireless access point location, TV position, office, study nook, rack location, intercom position, and any fixed equipment with high bandwidth or low tolerance for dropouts.
This matters because not everything should live on WiFi just because it can. Smart TVs, desktop computers, gaming consoles, NVRs, NAS units, access control hardware, and many AV devices are better hardwired. Every device moved off WiFi frees capacity for the devices that truly need wireless access. That improves the whole system.
Cabling also gives you options later. A room used as a guest bedroom today may become a home office next year. A family room may gain a mounted display, conferencing hardware, or a secondary access point. Renovations should create headroom, not just solve the current layout.
Access point placement beats router power
People often ask how many access points they need, but the better question is where they should go. One oversized router can still perform poorly if it is hidden in a cabinet, shoved into a garage, or installed at one end of the property. A well-placed set of access points with wired uplinks will usually outperform a stronger single device.
Ceiling-mounted access points are often the cleanest answer because they provide better coverage geometry and stay clear of furniture and appliances. That said, every site has trade-offs. Heritage ceilings, concrete slabs, limited cavity access, and architectural lighting details can all affect the final plan. In some renovations, wall-mounted APs or discreet shelf placement may be more appropriate.
Outdoor coverage needs separate thought. If you are renovating and adding an alfresco area, pool zone, detached garage, or gate intercom, include outdoor-rated wireless coverage in the original design. Trying to push indoor WiFi through external masonry rarely delivers a reliable result.
The network rack matters more than most clients expect
Where the equipment lives affects serviceability, cooling, cable organization, battery backup options, and future expansion. A proper comms location should not be chosen just because there is spare space under the stairs. It should have ventilation, power, practical cable pathways, and enough room for the gateway, switch, patching, NVR, alarm hardware, and possibly audio or automation controllers.
This is especially relevant when the network supports more than internet access. In integrated properties, the network also underpins CCTV, intercoms, access control, smart lighting gateways, Home Assistant servers, Apple Home hubs, streaming systems, and remote support tools. If the rack is poorly planned, every future service task becomes slower and every upgrade becomes more disruptive.
For homeowners, this means fewer random boxes scattered across the house. For builders and project managers, it means a cleaner handover and fewer post-completion complaints.
Renovation WiFi should support the whole system
WiFi is not a standalone service anymore. It is the transport layer for a lot of what clients now expect from a modern property. If your renovation includes Bosch or Hikvision security, Akuvox intercoms, UniFi networking, DALI-2 lighting control, Home Assistant automation, or Apple Home integration, the network has to be designed around reliability first.
That usually means separating traffic where appropriate, sizing switching properly, and planning for PoE loads. A network carrying several AI-enabled cameras, door stations, access readers, and multiple access points has very different requirements from a network built only for a few phones and laptops. The same applies to commercial projects with staff devices, guest access, point-of-sale systems, and security infrastructure sharing the same environment.
There is also a practical operational point here. Integrated systems are easier to manage when one provider understands the electrical, network, security, and automation layers together. That avoids the common situation where the electrician blames the internet provider, the IT contractor blames the hardware vendor, and the client is left with a system that technically powers on but does not perform reliably.
Mesh has a place, but renovation is when you should avoid depending on it
Wireless mesh products can help in finished homes where cabling is impossible or undesirable. But if walls are already open during a renovation, relying on mesh as the main plan usually means missing the best opportunity to build it properly.
Mesh can be useful for temporary coverage, difficult outbuildings, or edge cases where a cable path is genuinely impractical. The trade-off is that wireless uplinks are more vulnerable to interference, distance, and changing environmental conditions. That may be acceptable for casual browsing. It is less acceptable when the same network supports work calls, security devices, and automation routines.
A professionally designed renovation network normally uses wired backhaul wherever possible, then reserves wireless bridging for the few locations where the building makes cabling unreasonable.
What to decide before the walls close
Before plaster goes up, finalize access point locations, outlet positions, rack size, and cable counts. Confirm where the ISP handoff will arrive and whether that location suits the main equipment room. Identify any outdoor wireless needs, gate devices, detached structures, and future expansion points. If the property will include CCTV, intercom, audio visual zones, or lighting control, those systems should be planned in the same conversation.
This is also the right time to decide whether the project needs a business-grade platform such as UniFi throughout, especially if visibility, remote management, and coordinated switching and wireless performance are priorities. In higher-value renovations, that kind of platform consistency tends to pay off because troubleshooting is faster and system behavior is more predictable.
In Sydney renovation projects, this matters even more in larger homes and mixed-use properties where concrete, multiple levels, outdoor entertaining areas, and integrated security systems all place more demand on the network than a basic retail setup can comfortably handle.
The smartest renovation WiFi decision is rarely the most visible one. It is the quiet infrastructure choice that keeps cameras online, streaming stable, calls clear, and automation responsive long after the renovation is finished. Build for the way the property will actually operate, and the network will stop being something you notice at all.